Facing the facade of the house is one of the main components not only of external attractiveness, but also of reliable protection of external walls from the adverse effects of natural factors: rain, snow, sunlight. In addition to the protective functions, the cladding of the house creates a good thermal insulation of the room.
Today, in the construction market, you can find many options for facade cladding. One of the popular types of finishes is siding. Do-it-yourself facade decoration with siding does not require special training, skills and abilities. A responsible approach, the right choice of material, strict adherence to the installation technology, as a result of which a high-quality facade finish will be ensured.
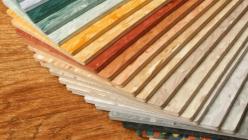
Varieties of siding panels
Before proceeding with the cladding of the facade of the house, you need to familiarize yourself with the varieties of siding panels and study the characteristics of the material from which they are made.
Steel
Steel siding is used for cladding industrial buildings and warehouses.
Advantages:
- a large selection of colors and shades;
- resistance to deformation;
- durability;
- not flammable.
Flaws:
- periodically requires coating with an anti-corrosion compound;
- dents from mechanical damage remain;
- a large mass increases the load on the foundation of the building, which must be taken into account even when building a house;
- high price.

Aluminum siding is used for cladding industrial and residential buildings.
Advantages:
- light, strong and durable material;
- does not fade in the sun;
- a huge selection of colors;
- acceptable price.
Flaws:
- corroded;
- deformations from strong mechanical impact are possible.

Wooden siding is mainly used for interior cladding of residential and office premises.
Advantages:
- aesthetic appearance;
- retains heat well.
Flaws:
- fragility;
- high price;
- needs constant impregnation with special compounds to increase the service life.
cement

Cement siding is the latest technology for building facade cladding. Cellulose fibers are added to ordinary cement, thus, a sheathing is obtained that resembles expensive types of wood. A special pressing technology allows you to make this type of siding with any pattern. It is applied to a covering of industrial objects. For residential premises it is used in rare cases.
Advantages:
- a huge selection of colors;
- not combustible;
- durable and strong.
Flaws:
- large weight, which will create an extra load on the foundation;
- complexity of material processing;
- facade cladding will require not only special training, but also the use of respiratory protection equipment (respirators);
- high price.
Vinyl siding is one of the most used types of finishes. The material looks spectacular and expensive, as it imitates many textures: expensive types of wood, stone, marble. You can also choose different colors and create an original pattern or picture.
Advantages:
- simplicity and ease of installation;
- reasonable cost;
- reliability, durability (more than 20 years);
- lightness of the material;
- a huge selection of textures and colors;
- can be sheathed on any type of surface;
- the ability to replace multiple panels;
- can be treated with various detergent mixtures.
Flaws:
- vinyl panels do not withstand strong impacts and may crack.
Facade cladding with vinyl siding is the best solution for finishing the facade of a house. It is desirable that a specialized team was engaged in facing the facade. Poorly laid panels will allow air, moisture and insects to pass to the wall of the house, and this threatens to damage it. It is possible to sheathe the facade with your own hands, for this you need to prepare tools and materials that will help in the work, as well as read the instructions.
Tools and materials

Required tool:
- measuring instruments (ruler, square, tape measure);
- hammer;
- rope;
- screwdriver;
- ladder;
- electric saw for cutting panels.

Material:
- outer and inner corner;
- window strip;
- H and J profiles;
- starting and drain bar;
- spotlights.
Stages of facade finishing
Before sheathing the facade with siding, it is necessary to strictly follow the installation technology, which consists of several stages.
counting

- the area of the walls of the house (cottage);
- wall dimensions;
- size and number of window openings;
- type of roof of a country house.
Having all the data for the calculation, you can independently calculate the required number of panels for cladding using the following algorithm: subtract the area of doors and windows from the area of \u200b\u200ball the walls of the house, divide the resulting number by the area of one siding panel. Multiply the result by 1.10. Thus, the panel area is calculated with a 10% margin.
Preparation
Prepare the surface of the walls. Clean them of pollution, remove unnecessary items (pipes, trim, window sills, etc.). Blow out cracks with mounting foam or seal with cement mortar. If the surface is wooden, then treat it with a special mixture (antiseptic).
crate

If the house is new, then the crate is not required. Provided that the house is old, it is necessary to prepare a crate for attaching panels. For the crate, wood or metal is used. Wooden crate is cheaper than metal. But the metal crate is more reliable and durable. For a wooden crate, slats that are pre-treated with an antiseptic are suitable. The iron crate is made of galvanized profile.
Warming and waterproofing
The next step is insulation and waterproofing. Styrofoam can be used as a heater. For waterproofing - a membrane. The first layer is a heater, the second is a membrane, and then a new crate is made.
Installation
- The siding is fastened with a gap between the end of the panels and the corners of 6–8 mm. Between the panels and the crate, it is also necessary to maintain a gap of about 2 mm to prevent deformation of the siding.
- Before attaching a new panel, it is connected to the panel attached to the crate. The outer corner should close the joints of the panels.
- Fasten planks of window openings and j-profiles, including in doorways. Lay the corners of the profiles with an overlap.
- Install the H-profile in a vertical position, leaving a gap of 3–5 mm at the top and bottom.
- Fasten the finishing bar under the roof of the building.
- The first row of siding is attached to the starting bar, and is reinforced with a self-tapping screw at the top and in the middle at a distance of 35–45 cm. Installation of the following rows occurs in the same way.
The technological process of installing siding is not particularly difficult, so you can do it yourself.
Video
Detailed description of the stages of installation of siding:
Scheme
Correct installation diagrams:


Siding is already widely used in construction as a finishing material. Thanks to its beautiful appearance and ease of installation, siding has gained its popularity. Such a finishing material is used during the construction of a private house, cottage, bathhouse or other auxiliary building. Do-it-yourself sheathing of a wooden house with siding does not differ from sheathing of a house from another material, the technology of work is the same.
Reasons for using siding


Required Tools

House siding work is simple and do not require special knowledge, but still it is necessary to get acquainted with the sequence of work, as well as their features, especially if a person has not encountered this type of work. Before sheathing a wooden house with siding, it is necessary to purchase material, check the availability of everything necessary and perform preparatory work.
Tools that will be needed to complete the work:


Types of siding
There are several types of siding:


When ordering a finishing material, it is necessary to measure the finishing area and the number of openings. Sheathing windows with siding provides for additional material consumption.
In addition to the panels themselves, additional mounting elements will be required:


Preparing for installation
Preparation for the installation of siding includes the implementation of several mandatory items:
- Inspection of geometric indicators. Often, siding is used to trim not only new buildings, but also buildings that have been in operation for a long time, which could “sag” and change their geometric shape. Therefore, it is necessary to measure the diagonals of the walls so that they have a square shape. Also check the geometric shape of window and door openings. Using a plumb line, you need to inspect the perpendicularity of the walls to the base.
- Surface preparation. It is necessary to remove all protruding elements from the surface of the facade, it can be a lattice on the windows, a platband or shutters. Also, it is necessary to remove the falling off plaster or tile.
Paint, dirt and dust are removed from the wooden surface, and the walls should also be inspected for the presence of fungus and mold. If present, be sure to thoroughly clean the surface with coarse sandpaper. Wooden house after cleaning treated with antiseptics, in order to further preserve the material from rot and fungus, as well as fire retardants to protect against fire in case of fire.
- Frame device. The step-by-step instructions for mounting the frame are quite simple, first of all, you need to decide on the material of the frame. It can be wooden or metal.


For a horizontal siding device, the frame is installed vertically; if the siding is installed horizontally, then the guides are also mounted horizontally. Vertical siding is non-horizontal, installed vertically, and products of the corresponding design.
- Wall insulation. It is convenient to use mineral wool as a heater. The mats are cut to the desired length and placed between the guide posts. The insulation needs to be slightly larger in order to be firmly fixed in place. In addition to mineral wool, glass wool, polystyrene foam or extruded polystyrene foam can be used as a heater, but it will take more time to install such a heater.
- Waterproofing device. For finishing a wooden house, the presence of a hydro- and wind-insulating membrane is mandatory. If there is no insulation, then the film is mounted directly on the wall before mounting the frame. In the presence of thermal insulation, a hydro- and wind-insulating membrane is arranged on top of the insulation and frame. Under the installation of siding, the technology provides for the presence of waterproofing for the entire area of finishing.


Installation technology of siding and its structural elements
The technology of siding sheathing causes the device of additional decorative and functional elements. Mounting is done from the bottom up. Finishing the plinth can be plaster, tile or special siding.

Low tide is a decorative element that performs a function removal of atmospheric precipitation from the facade. The ebb is installed according to the level, observing the horizontal, and is attached to the special nail holes to the frame using self-tapping screws. If the nail holes do not fit on the guide post, then you can make a hole in the right place with a punch. The ebb is mounted in such a way that it can easily move within the nail hole, this will prevent deformation of the mounted siding. Low tide installed along the perimeter of the building above the basement. After installing one element, the next one is mounted with an overlap of 2.5 cm.

External and internal corners installed in one element to the entire height of the building. An element of an external or internal corner is measured to size and cut off with a grinder. Then it is installed in the appropriate corner and fastened with one self-tapping screw. In this position, you need to adjust so that the corner element is located strictly perpendicular to the foundation. When the level is set, the corner is attached to the frame with self-tapping screws in increments of 200 mm. Fastening is carried out in the same way as fastening the ebb. The correctness of the installation is checked by moving the element along the axis.

Start profile it is installed slightly above the ebb and fixed with screws to the frame in the same way as other elements. The correctness of fastening is checked by horizontal movement of the profile. If it does not move, then you need to loosen some fasteners a little.
The platband is cut to the size of the window opening. For each element, it is necessary to provide for cutting at an angle of 45 degrees. Thus, the size of each casing is taken with a margin of 150 mm. In the upper casing, special tongues 20 mm long are arranged to protect against atmospheric precipitation. First, the lower element is attached, then the vertical, side ones. The upper trim is attached last, the tongues are inserted into the vertical elements. Fastening is carried out in the center of the nail holes, and all elements must be able to move along the axis.

Siding installation starts from the bottom panel. The lower part is inserted into the starting profile, and the upper part is screwed to the rails with self-tapping screws. Fastening siding to a wooden house starts from the yard. Work starts from high traffic areas: doors or gates. If the length of the wall is greater than the length of the siding, a connecting element is installed, it is used as it, the ends of the profile are inserted into it.

After attaching the first panel the second one is installed, in the same way. The installation of the last panel is carried out only after the installation of the finishing profile. If the last panel does not fit, it can be cut off with a knife. The cut line is marked and drawn several times along it with a knife, and then the excess part of the panel is broken off with pendulum movements. Window and door openings are cut in the same way.

Soffit for finishing open gables of roofs gives the building a finished look. To install them, j-profiles are used. One is mounted against the wall, and the second parallel to it at the plumb roof. The distance between the profiles is measured and the soffit is cut along it, but it must be 6 mm less for possible thermal expansion. The soffit is mounted between the profiles.
Specialization: facade finishing, interior finishing, construction of dachas, garages. The experience of an amateur gardener and horticulturist. He also has experience repairing cars and motorcycles. Hobbies: playing the guitar and much more, for which there is not enough time :)
What you need to know about siding
First of all, it should be noted that the concept of siding in our time includes a whole group of finishing materials that differ in both performance and cost. Therefore, first consider the existing types of siding for exterior decoration:
- wooden - the history of siding began with this material. Initially, this sheathing was simply boards fixed to the walls in a herringbone pattern in a horizontal position. This arrangement made it possible to prevent moisture from entering under the skin during precipitation.

In our time, wooden siding has been improved and acquired a spike and a groove at the ends, i.e. connects to each other in the same way as a regular lining. Therefore, this material is also called American clapboard.
Wooden siding has all the advantages and disadvantages of other wooden finishing materials, which we have repeatedly discussed on the pages of our portal. In general, it will be an excellent choice if your country house is built of wood.
The cost of wooden siding starts from 350 rubles. per square meter;

- Vinyl siding - this material is a panel fired in the form of several interconnected siding boards. I must say that recently it has been most popular due to its following advantages:
- low cost - from 200 rubles 1m2;
- resistance to moisture;
- resistance to biological influences;
- attractive appearance and a wide choice of colors;
- practicality - washing the walls finished with siding can be done with water directly from the hose;
- good durability - 30 years or more;
I must say that there is a large amount of low-quality vinyl siding on the market, which can become unusable in the first winter. Therefore, buy material from reputable manufacturers. In addition, pay attention to the back of the panel - it should not be uniform and smooth;

- metal siding - is a stamped panel made of aluminum or galvanized steel with a profile in the form of several boards. Externally, metal siding reliably imitates wood, since the panels have a photo-coating.
True, there are types of metal siding for exterior decoration, which are painted in a solid color.
Despite its attractive appearance, metal siding is rarely used for finishing residential buildings, as it has the following disadvantages:
- high cost - the price of galvanized sheets starts from 450-500 rubles per 1m2. Aluminum siding costs even more;
- high thermal conductivity;
- noise during wind and precipitation.

- cement siding - is a board made of fiber cement. I must say that this material is not widely used, as it has a high cost of more than 1000 rubles. per 1m2, while it has a number of disadvantages.
If you have a dacha with a temporary house, you can sheathe it with ordinary boards, i.e. since the facades were sheathed initially, when siding was invented.

Thus, the optimal material for facade cladding is vinyl siding. If the house is wooden, it makes sense to use a wooden covering. But, of course, if you wish, you can use other finishes.
Mounting technology
The technology of finishing the facade with siding includes several stages:

Step 1: preparing materials
In addition to the siding for the frame sheathing, you will need some other materials:
- materials for the frame - if PVC siding will be used for the facade, a metal profile and suspensions should be used. If the siding is wooden, you can make a frame of bars;

- insulation - you will need it if you, taking the opportunity, want to insulate the house;
- vapor barrier membrane;
- additional elements - slopes, ebbs, corners, etc.
If the house is wooden, then you will also need impregnation for wood and interventional insulation.
After preparing all the materials, you can start working.
Step 2: preparing the walls
Before finishing the walls, you need to perform some preparatory steps. They consist in the dismantling of all elements that may interfere with further work. In addition, if the facade has areas with peeling, they must also be removed.

If the house is wooden, the preparatory work is done a little differently:
- after dismantling all hinged elements, it is necessary to treat the walls with protective impregnation. Instructions for its use are usually available on the package;
- then interventional gaps must be insulated, if, of course, there are such. To do this, you can use tow, polyurethane cords, as well as special putties.
You can start finishing a new wooden house only after it shrinks. An exception are buildings made of glued laminated timber, as they give minimal shrinkage.

Step 3: Mounting the frame
The installation of the frame is the most crucial stage, since it depends on how the wall finish will turn out to be even, strong and durable. Therefore, the work must be done carefully and carefully.
- first of all, it is necessary to mark the walls, indicating the location of the racks. To do this, beat off the vertical lines in increments equal to the width of the insulation minus 1-2 cm. In addition, it is necessary to draw the profile location lines along the perimeter of the slopes;
- then on the lines obtained, the installation sites of the suspensions should be marked with a step of 50 cm;
- then drill holes for mounting hangers and fix them on the wall with dowel-nails;

- after that, make cuts in the insulation plates and put them on the hangers. Place the insulation close to each other so that there are no gaps;
- then you need to fix the vapor barrier film on the insulation. To do this, you can use special plastic dowels with wide caps, which are popularly called "umbrellas". To install them, drill a hole in the wall directly through the film and insulation, then drive a dowel with a nail into it;

- then you need to fix it in the profile hangers. The most difficult thing in this operation is to set them correctly. The fact is that all racks should be located not only strictly vertically, but also in the same plane.

Therefore, it is advisable to first install the racks extreme from the corner at the same distance from the wall, and then pull the threads between them. According to them, you can correctly set the intermediate racks.
Here, in fact, are all the main nuances of mounting a metal frame. If you do not insulate the walls, then the work is carried out in exactly the same way, the only step of installing the insulation is omitted. But the vapor barrier film will not be superfluous, as it will protect the walls from wind and moisture.

If it is planned to finish the siding of a wooden house, then it is better to make the frame from beams. The latter can be mounted on suspensions, like metal profiles, or attached directly to the wall, for example, using metal corners.
Wooden beams and slats, before mounting on the wall, must be treated with a protective impregnation.
Keep in mind that there must be space between the skin and the vapor barrier film. Therefore, when installing a wooden frame, it is necessary to install a counter-lattice. For these purposes, wooden slats with a thickness of about two centimeters are suitable.

Step 4: sheathing the frame
The process of installing siding largely depends on its type. First, consider how the walls are finished with vinyl siding:
- work begins with the installation of the start profile. If the wall is sheathed together with the plinth, then the profile should be installed at a distance of 10 cm above the blind area. In the process of fixing the profile, be sure to use a level so that the bar is located strictly horizontally around the perimeter of the house.

If the plinth sticks out, before fixing the starting bar, it is necessary to install a low tide. At the same time, the bar should cover the upper part of the ebb, into which self-tapping screws are screwed;
- then installation of corners on external and internal corners is carried out. The corners are also set according to the level and fastened with self-tapping screws;

- now you need to install slopes, since after wall cladding it is more difficult to install them. A step-by-step instruction for finishing a window with siding with your own hands looks like this:
- along the perimeter of the window we install guides, while we must use the level;
- then you need to cut the near-window profiles to the size of the opening. The joints of the vertical slopes and the upper horizontal must be cut at 45 degrees;
- the lower profile must be cut and bent from two opposite sides so that inversions are formed, as shown in the diagram above;
- after that, you need to fix the window profiles. From the side of the window, they are inserted into the guides, and from the side of the wall they are attached to the frame with self-tapping screws;
- at the end of the work around the perimeter of the opening, it is necessary to install platbands, into which the panels are subsequently filled;

- after that, under the visor, you need to install the finishing profile;
- Now you can begin to mount the siding panels. Their lower part is connected into a hook with the starting bar, and the upper part is fixed to the frame with self-tapping screws. In this case, the panels extreme from the corner are brought into the corner profile.
When installing the last panel in a row, the length of the siding is shortened; - then the second row of panels is mounted. Their lower part is connected in a hook with the upper part of the first row. At the same time, they are fastened from above with self-tapping screws in the same way.
Keep in mind that the self-tapping screws must be positioned in the center of the elongated holes. Moreover, the caps can not be tightened tightly. There should be a distance of about a millimeter between them and the siding so that the screws can move freely along the holes;

According to this principle, all the walls of the frame are sheathed. In general, the process is quite simple, the only difficulty can be the finishing of obstacles on the wall.

If pipes pass through the wall, it is necessary to make cutouts in the siding for them, and at the same time seal the passage. For sealing, you can use all kinds of sealing tapes;

- the last panels most likely you will have to cut to height. Then from below they are connected to the previous row of panels, after which they are refueled into the finishing profile;
- in the case of finishing the gables, the guides are attached to the visor. In this case, the extreme panels are cut at an angle equal to the slope angle;

- at the end of the work, you can sheathe the eaves with siding. To do this, fasten the guides on two opposite sides, as shown in the photo above, and insert panels between them, pre-cut in width.
The principle of installation is approximately the same, according to which the ceiling is usually sheathed with plastic panels inside the house;
Home craftsmen are often interested in how to seal the seams in the windows during the installation of slopes? The best option for sealing joints is construction sealant.
This completes the siding process. It should be noted that according to this principle, not only the facade of a private house, but also a balcony or loggia from the outside can be finished. The installation of metal siding is approximately the same.

Wooden material is mounted a little differently:
- since guides are not used when installing wood siding, work begins with attaching the first row of boards. First, the board must be leveled by level, placing it with the groove down, and then fixed on the frame with self-tapping screws that are screwed into the bottom edge of the groove at an angle;
- then the second row of the board is connected to the first. In this case, from the side of the spike, you need to drill holes according to the diameter of the self-tapping screw. The upper part of the hole must be expanded with a drill along the diameter of the screw head.

After preparing the holes, self-tapping screws are screwed into them. According to this principle, all walls are sheathed;
- after wall cladding, corners are finished. As a rule, for these purposes, wooden decorative corners are attached to the corners with the help of small small carnations;
- at the end of the work, dowels must be glued into the holes of the self-tapping screws. If you do not have dowels, you can fill them with putty to match the color of the wood. After that, the surface of the walls can be varnished or treated with decorative impregnation.
This completes the process of siding the house with siding. As for the finishing of the slopes, for these purposes you can use the usual clapboard, which is attached to the rails nailed along the perimeter of the openings. The junction of the slope and wall decoration is also closed with a wooden corner.
To give the building a stylish aesthetic appearance, such finishing material as siding is becoming popular. For its installation, you can, of course, use the services of professional builders. However, the price of the services of construction companies is quite high. Therefore, having the right tool, the installation of siding can be done by hand. The owner of a private house or cottage, this is especially true.
The easiest way to get a beautiful front lawn
Of course, you have seen the perfect lawn in the movies, on the alley, and perhaps on the neighbor's lawn. Those who have ever tried to grow a green area in their area will no doubt say that this is a huge job. The lawn requires careful planting, care, fertilization, watering. However, only inexperienced gardeners think so, professionals have long known about the innovative tool - liquid turf AquaGrazz.
Necessary power tool
The process of finishing the facade of any task with siding will facilitate the presence of the following tools:
- Perforator.
- Hacksaw and scissors for metal
- Cordless drill (screwdriver).
- Building level (length - 2 m).
- Marker or pencil for marking.
- Roulette, at least 5 meters long.
- Rope.
- Building corner.
- Electric carry.
- Punch.
Of course, it is not enough to have the necessary tool, you need to be able to use it correctly. The following step-by-step instructions for cladding the facade of a house with siding with your own hands will help you avoid most mistakes. However, before starting facing work, you should understand what siding is and what materials it is made of.
Siding and its varieties
It is no secret that the quality of any finishing work, including the installation of siding, will depend on the material used. Siding is a sheathing material made in the form of lamellas (plates) or slats. The plates are used to finish the walls and facade of the house, and basement siding is used on the lower floors. Facing material of this type is made from such raw materials as:

- Plastic. It is based on acrylic and vinyl polymers. The popularity of such material is difficult to overestimate. Despite the low price, it has a number of advantages. Such siding will not rot, because. it is resistant to moisture, it does not crack, it is resistant to fire. Plastic siding can be used both for finishing the house from the outside and from the inside. The disadvantage of this material is the low resistance to mechanical damage.
- Metal siding. As a rule, galvanized iron or aluminum is used for manufacturing. Such sheathing material has maximum resistance to fire and deformation. The disadvantages of metal siding is its weight, and as a result, more laborious installation. In addition, if its polymer coating is broken, the siding will be susceptible to corrosion. Therefore, sheathing a timber-framed wooden house with metal siding requires special care. The condition of the metal coating should be checked regularly.

- Wood siding. Finished with wooden siding on the outside of the house are quite rare. Such sheathing material is not as durable as metal, requires constant care. Wood siding is also very expensive. However, all its shortcomings are offset by excellent thermal insulation, aesthetic appearance, soundproofing, and moisture resistance. Remember that open fire is extremely dangerous for wood siding.
- Fiber cement siding. This material has all the above advantages. It is absolutely resistant to fire, mold, moisture. However, it also has a solid weight, respectively, its installation will be difficult. For example, if plastic or metal siding is mounted using a tongue-and-groove method, then fiber cement siding is only overlapped and only using special fasteners. Basement siding made from such material is in demand.
Finishing the facade and walls of the house with do-it-yourself siding is a simple, but very painstaking work. Getting started, calculate the amount of material required. Do not forget that siding in the form of rails is used for the basement, and in the form of panels for walls and facades.

preliminary calculations. Preparatory work
The approximate amount of siding required for finishing the house is determined based on the area of the walls, facade and other elements outside the house. In other words, the area of the walls and facade of the building is divided by the length of the siding panel. An accurate result can be obtained using a building sketch. Finishing long wall surfaces with siding will require butt joints, this will require an H-profile. Keep in mind that joints made in different places spoil the appearance of the house. A high-quality sketch of the facade of the house allows you to calculate the installation of siding with your own hands with the least number of connections, while maintaining an acceptable cost.
Before installing siding with your own hands, it is necessary to carry out preparatory work to prepare the walls outside the house. To do this, it will be necessary to remove dust and dirt, lime and residues of other finishing materials, etc. from the sheathed surfaces. If plaster has been applied to the facade and walls of the house, which has become of poor quality, then it will need to be dismantled.

In addition, it will be necessary to remove from the walls all external elements that interfere with the installation of siding, these include gutters, cornices, window sills. For a wooden building, it will not be superfluous to check the walls for the presence of fungus and mold.
If you plan to lay thermal insulation materials under the siding, you will need a vapor barrier film. It is used to protect the insulation from condensation.
First stage. frame
Installation of siding is carried out on a frame prepared in advance by one's own hands. For its manufacture, metal or wooden materials are used. It is worth noting that the metal crate has the advantage of durability and strength. In addition, the metal frame is better fixed on uneven surfaces. Beating the defects of the mill with a wooden frame is much more difficult.
The profile is attached to the wall with hangers, and the distance between them should not exceed half a meter. This installation method allows you to set the profiles using the building level, despite the unevenness and imperfections of the walls.
If finances are limited or the installation of a metal crate is impractical, a wooden frame is used.

For such a crate, it is forbidden to use material that exfoliates, is deformed, has traces of mold or rot. This is especially true for a wooden log house.
The frame is mounted on even, prepared for this, walls. Siding panels are mounted on the facade of the house or its walls horizontally. Accordingly, the lathing bars or metal profiles are installed vertically. The guides are attached to the wall of a wooden house with nails or self-tapping screws. If the base is made of concrete, monolith or brick, use a perforator and dowels. Each rail or profile is leveled.
In the event that, together with the cladding work, it is planned to also external thermal insulation of the walls, the crate for siding is installed after all work with insulating material. In this case, two frames will be mounted: for siding and for thermal insulation. It is important that the laths of the crate are parallel to each other.
How to work with siding
Regardless of the material from which the building is built, after preliminary work, do-it-yourself siding installation is carried out in the same sequence.

Work on finishing a brick, monolithic, timber, any house begins with the installation of the launch panel and fixing it with nails or self-tapping screws. The next step is to mount the H-rail, if it is provided, and install the corner fasteners. Window blocks and doorways are made using profile J.
Starting profiles and guides must be installed flawlessly, and the step-by-step instructions serve as a guide for beginner finishers. The first steps look like this:
- Initially, you need to use the level to find the lowest point on the frame, and step back from it up 5 centimeters, make a mark. This is done with a screw or a nail.
- Consistently, moving around the house, we screw in the screws as marks. Starting profiles will be installed in these places. Do not forget about the marks in the corners of the building.
- We stretch the construction cord between the corner screws.
- We put on the rails of the frame the borders of the profiles installed at the corners. To do this, we apply the profile to the crate, and, using a pencil or marker, put marks on its edges.
- Adhering to the cord, we make a horizontal gap of six millimeters from the corner profiles and mount the starting guide to the profile or battens of the crate.
Remember to leave a gap of 10 millimeters between the profiles.

This is necessary to compensate for temperature differences. A gap of six millimeters should not be made if you remove part of the nail strips in advance, and they will not rest against the J profile during temperature differences. The initial profiles should only be mounted horizontally. Don't waste your time on this. Otherwise, it will be extremely difficult to fix the siding, which will appear later on.
External corner profiles
Do-it-yourself installation of these elements is carried out in the following order:
- We mark the spotlights, it is important for us to know where their edges will be.
- We take the guide and apply it to the crate, leave a gap of three millimeters between it and the soffit (roof). Then we fix the guide with self-tapping screws, but its lower edge should be six millimeters below the starting profile.
- We check the vertical installation. In the absence of defects, we fix the bottom and other places. Do not abuse the fasteners in the corners.
If the height of the building exceeds three meters, the profile will lie one on one. To do this, the upper profile will need to be trimmed. This is necessary so that there is a gap of nine millimeters between the connecting elements.

Profiles need to be connected at the same level and on one side of the building. If basement siding protrudes, the profile must be cut so that a gap of six millimeters remains between them.
Internal corner profile
The installation methods for internal corner profiles are practically no different from the methods for finishing external corners. The distance between the corner and the soffit should be three millimeters, and the lower edge of the profile should be six below the J profile. If the basement siding or other element protrudes from below, the profile will need to be cut.
Finishing windows and doors
Many novice finishers experience difficulties at this stage. Openings can be flush with the wall surface, they can be recessed, or they can protrude. The most common openings are on the same level with the wall. The instructions for finishing such an opening look like this:
- We protect openings from precipitation.
- We install platbands on the openings (two vertical and two horizontal are used for each opening).
- Joining profiles.
Installation of the main siding panels
Do-it-yourself siding work on the facade of a house always begins with the most inconspicuous part of the building. This allows you to work out the installation technology with the least losses.

- The panel is mounted in the corner profile and joined with the lock of the starting rail.
- The panel is fixed to the frame.
In the future, the panels are mounted using H-profiles or overlap one another. Installing the remaining panels is no different from fixing the first one. Approaching the opening, the excess will need to be removed. Don't forget to check the horizon of the panels every three levels with a spirit level.
To equip the lower part of the house, basement siding in the form of rails is used; you should not use ordinary panels for these purposes.
In addition to decorative functions, siding protects the house from precipitation, winds, and when laying a heat-insulating layer, from temperature changes.


Siding is a large group of facade finishing materials, the name of which comes from a wooden board fixed to the wall in a certain way. The principle of sheathing a house with siding was borrowed from the roof, when the upper element hangs over the lower one. Thanks to this, the main materials were protected from weathering, fading in the sun, and most importantly, from getting wet. Rainwater ran down the panels without getting in to the wall. Now siding is used in hinged facades and for home insulation.

This is how a house sheathed with classic siding looks like in the USA - in its historical homeland
Types of siding
There are several types of materials that fall into this category:
Classic wooden board for the facade, which is mounted overlapping each other. Now this method of sheathing is rarely used, but more often they use an imitation in the form of a profiled wooden lining for a separate facade - “American”.
Modern wood siding. The panels are not an array, but pressed wood fibers bonded with astringent resins. The structure resembles dense fiberboard, the protective coating is several layers of paint.
Wood-polymer composites. They are produced by companies that specialize in the production of WPC decking boards. The composition is clear from the name, the panel is produced profiled with a tenon-groove connection or a “lock”. It has the largest thickness among modern siding options - over 10 mm, taking into account internal stiffeners. One of the most durable options, but more expensive than some types of natural wood siding.

One of the profile samples of modern wood-polymer siding
Cement siding for house cladding. Composite material, but not polymers, but cement act as a binder. In this case, the filler is cellulose fibers, which reinforce the panel and provide its fracture strength. It also has a large thickness - 8 mm.
You can sheathe the house with metal siding. Available in aluminum and steel. In the second case, it is a galvanized cold-rolled profiled sheet with a decorative polymer coating or coloring. The thickness varies between 0.5-2 mm.

Usually siding is "flat", but a metal profile can mimic a log
Vinyl siding for house cladding. The most popular "economy class" material for facade decoration. Available in two versions of use - for the plinth or for the facade.

Basement siding is often made under brick or stone
Note. Plinth panels are produced more "thick". They are often sheathed on the facade when they want to make the cladding more resistant to mechanical damage or create the illusion of stone cladding.
Features of choice and cost of siding
If we talk about mass demand, then many seek to sheathe the house with vinyl siding. It has an excellent combination of advantages: low price and good decorative properties, easy installation and surface care, low weight and high resistance to climatic factors.
In second place is solid wood siding, if in this category we count both the board and the “American” lining in all its modifications. Of course, due to the simple installation technology, profiled panels are more often used. This is a traditional type of siding for a wooden house or cottage in an ecologically clean area.

This is what the profile of an "American" looks like
If you want to get an almost reliable imitation of wood paneling with a long service life, minimal maintenance and repair costs, then composite panels are the best choice. Especially if there is a WPC terrace next to the house. They perfectly tolerate temperature changes, high humidity, and are resistant to adverse factors even in a big city or close to the road.
Sheathing a house with metal siding is rare. The aluminum profile does not withstand mechanical stress, which is inevitable for a low-rise building. Steel panels are durable, but they are more expensive than vinyl panels, and the decorative possibilities are the same. Durability is determined by the thickness of the sheet and the properties of the protective and decorative coating. The price depends on the combination of these factors.
Cement siding is used if the fire resistance of the finish is in the first place. And this is perhaps the only advantage of the material. Heavy, rather fragile during transportation (despite the reinforcement) and difficult to install - it loses in popularity to other types.

Cement siding can mimic the texture of wood, but it's not as easy to install.
The cost per square meter depends not only on the material. Many factors influence the price. And one of them is the manufacturer and the country. Even vinyl siding has a price range of 150 rubles. up to 600 rubles for 1 m2.
It is even more difficult with wood panels - for example, pine and larch differ in price by several times, and there are also more expensive types of wood. Plus a factory treatment that improves resistance to high humidity, but also significantly increases the cost of the board. For example, domestic larch costs from 300 rubles. per 1 m2, heat-treated wood of a domestic manufacturer raises the cost by 2-3 times, and imported heat-treated board costs 4-5 times more than ordinary wood siding.
Clearly about the choice of siding on the video:
How to calculate the quantity
There are two simple calculation methods: by area and by the number of panels.
First method:
Calculate the area of the sheathed planes. For ease of calculation, a surface with complex geometry is “split” into simple shapes.
From the resulting amount subtract the area of window and door openings.
Multiply the result by a correction factor that takes into account trimming waste. For simple planes, it is taken equal to 1.07-1.1, for complex ones - 1.15.
Divided by the useful (not total!) Area of one panel.
Round the result up to a whole number, and get the number of siding panels to install with a margin.
Clearly the calculations on the video:
The second method is convenient only for "simple figures" of facade or plinth planes. In this case, each next plane is calculated, adjusted for the possible use of scraps from the previous one. The calculation method for a "blind" wall is as follows:
Measure the height of the wall, divide it by the usable height of the panel. Round up to a whole number.
Measure the length of the wall, divide by the length of the panel. If after the decimal point it turns out 5 or more round up, less than 5 - down.
The results obtained are multiplied.
When rounded up, this will be the required number of siding panels. If the second figure was rounded down, then they calculate how much siding will need to be purchased in order to increase each strip in length.
When determining the number of strips for walls with openings, the planes between the corners and the boundaries of the openings are calculated separately from the "blind" sections.
The calculation of additional profiles is carried out for each type individually, depending on the size of the areas where they are used.

The most common types of additional profiles
Preparatory stage
Facing using crates does not require leveling the surface to an “ideal” state. But this does not mean that the walls do not need to be prepared for work. Especially when siding is only a part of the general measures for the installation of a hinged facade with insulation.
Therefore, it is necessary to clean the surface of old finishing materials, remove hinged elements of engineering communications, remove signs and lamps, dismantle ebbs and visors. The facade must be completely free.
If the facade is plastered, then it must be cleaned of crumbling areas, primed and, if necessary, leveled with mortar.

Cleaning old plaster is sometimes difficult.
Brick walls must be checked for cracks, their nature must be determined, the causes eliminated and repaired with a repair compound.
The walls of a house that was built a long time ago must be checked for damage by fungus and mosses. This is especially true for the basement, the first floor and the canopy area on the north side or in the "solid" shade.
Whether it is possible to carry out lining in winter depends on the scope of work on preparing surfaces for sheathing. Sheathing a wooden house with metal siding or vinyl and WPC can also be carried out in winter if the house is new. If you need to carry out "wet" repair work with solutions and liquid formulations - it is impossible.
And of course, it is impossible to install cement siding for painting and wooden siding in winter without factory protective treatment with special compounds.
Sheathing materials and installation tools
The crate can be made of wooden bars or a metal profile.
The beam is easier to fit, it is easier to attach siding to it, it does not serve as a cold bridge between the cladding and the wall, it does not change geometry with temperature changes. But the tree does not tolerate high humidity. Therefore, the timber must be aged (dry) and treated with an antiseptic.
Installation of siding on a wooden crate can be seen:
It is more difficult to work with a metal profile, it has high strength and durability (if it is galvanized). The only operational disadvantage is high thermal conductivity. Therefore, the bearing brackets must be mounted to the wall through heat-insulating gaskets.
To install the batten and siding, you need:
-
twine, chalk for marking;
ladder, ladder, scaffolding.
a set of tools for marking and level control;
hacksaw for metal or wood (depending on the material of the siding and the crate);
metal scissors for fitting panels (for metal siding);
puncher or drill (depending on the material of the walls and plinth);
a hammer, pliers, screwdrivers or a screwdriver with nozzles for the head of a hardware;
Clearly about the installation of a metal frame for siding on the video:
General principles for cladding with vinyl or metal siding
To have an idea of how to properly sheathe a house with siding, it is enough to know the general principles of installation:
Facing occurs according to the principle of filling the contour with additional profiles with panels.
Mount the crate with a step of laying out vertical runs of 250-300 mm.
They make markings for the starting bar, the quality of the skin largely depends on the correct installation of which.
First, the ebb attachment line is beaten off. If the entire facade is sheathed around the perimeter, then it should converge “to a point”.
The mounting line of the starting bar is above the ebb plus a gap to compensate for thermal expansion.
Mounting to the ebb crate, the starting bar and all trim parts takes place according to the general rules:
fasteners must be located strictly vertically relative to the crate;
the fastener head must be in the middle of the perforated hole (except for the upper fastening of the corner profiles);
screw the screws or drive in the nails not to the end, but leave a gap between the head and the surface of the part of about 1 mm.

Installation of the first, bearing strip of siding
After the starting bar, corner profiles are attached by hanging them vertically at the upper attachment point. Mount near-window strips or J profile around the openings. They finish the “framing” of the contour with a finishing strip or J profile.
Installation of the first panel begins with fixing the starting bar in the lock. Before fixing to the crate, a temperature gap is set between the end of the siding and the corner profile. Its value depends on the time of the year when the work is carried out, and the length of the panels. In winter - about 12 mm per 4 m of length, in summer - half as much.
The siding is increased in length either with an overlap of 20-25 mm (cutting the perforation of the bottom panel), or through a connecting profile with an internal gap along each end, as in the corner profile.
Every 5-6 rows control the level.

An example of installing metal siding
Features of sheathing a wooden house
When sheathing a wooden house with siding, it is necessary to take into account the features of the materials:
facade decoration, as well as internal work, must be started after shrinkage of the house;
for the crate, it is advisable to use a wooden beam (seasoned and treated with an antiseptic);
it is obligatory to treat the surface of the walls with an antiseptic, since after the installation of the sheathing it is impossible to control the condition of the wood and timely carry out the prevention of places affected by the fungus;
for additional protection, you can lay a waterproofing membrane;
even if the walls are even, and the siding is installed without insulation, the panels cannot be fixed to the wall - for the proper operation of the tree, a gap is needed, which creates a crate.

Wooden house cladding
Simplicity of installation of a siding does not exclude attentiveness and accuracy during work. An error when installing the starting profile, fasteners that are “overtightened” or incorrectly installed in the hole, non-compliance with the recommendations on the size of the temperature gap - all this can lead to serious consequences for the skin, which will not be so easy to eliminate.